Eyedropper tool is one of the most common and easy-to-use tools you will come across in Adobe Photoshop or any other image editing software. It allows you to sample and select pixel color values from anywhere in an image and then save the sampled color as the new foreground color or add them to the Swatches panel.
However, we might sometimes need to check if a specific color code exists in an image. It is a “mission impossible” to use the eyedropper tool to examine each value pixel-by-pixel. Most color palette generators or color picker tools could only extract the most dominant colors (aka the color theme for an image). They will not provide a list of all colors used in the picture.
So, how can we smartly do a reverse color search? It is easy. Follow along to learn this cool trick. Skip to Method 2 if you don’t have Adobe Photoshop.
Table of contents
- Method 1: Reverse color search in Photoshop
- Method 2: A free online tool to do a reverse color search
Method 1: Using Adobe Photoshop to do a reverse color search
- Open your image using Adobe Photoshop.
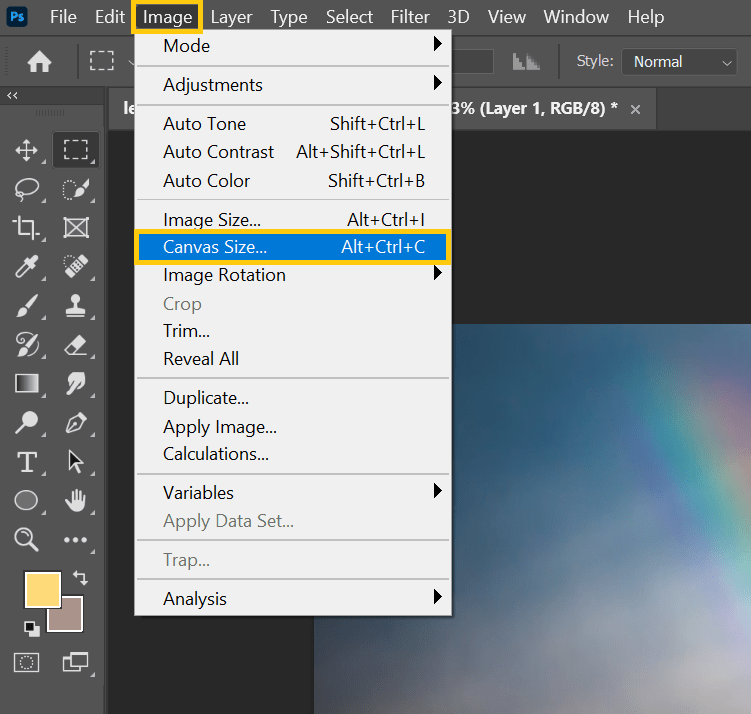
- From the Image menu, select “Canvas Size.”

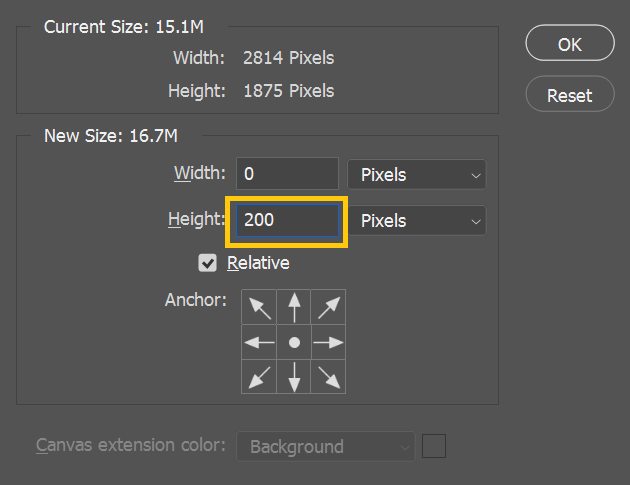
- Enable the Relative checkbox. Extend your canvas size a bit. Feel free to use any values for “Width” and “Height.” In this example, I am using 200 px for the extended height. Click the “OK” button.

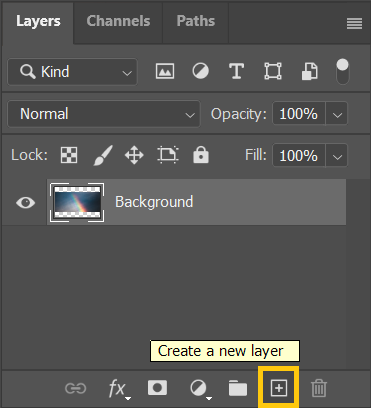
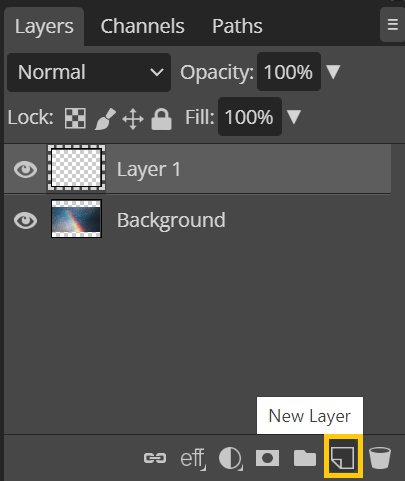
- Click the [+] button at the bottom of the Layers panel to create a new layer on top.

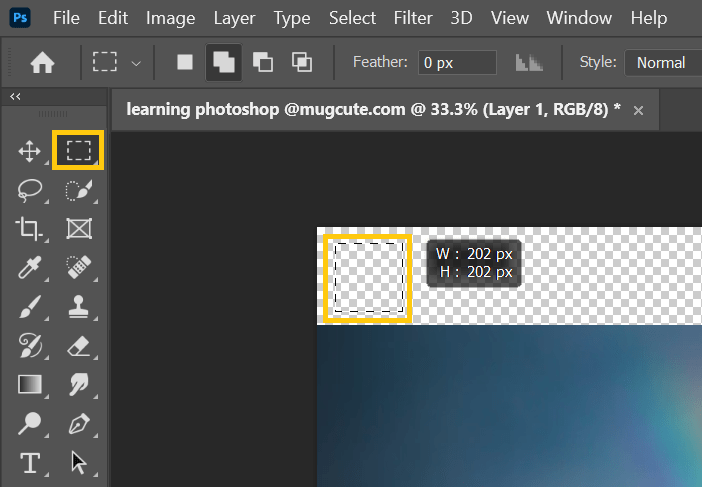
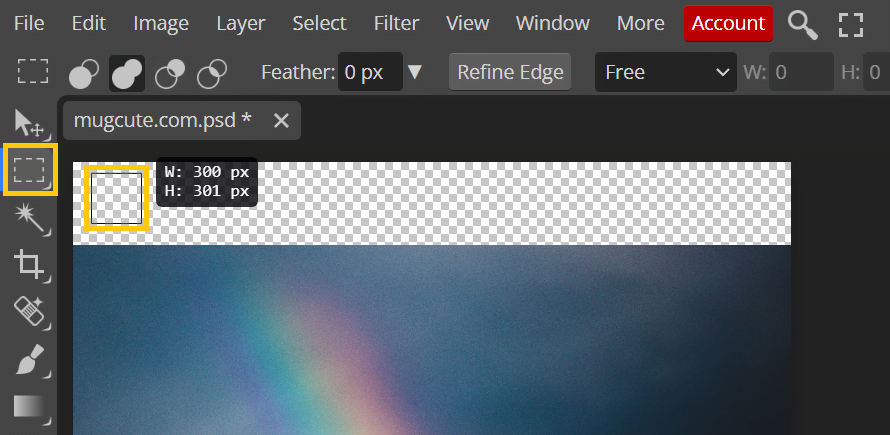
- Hit the
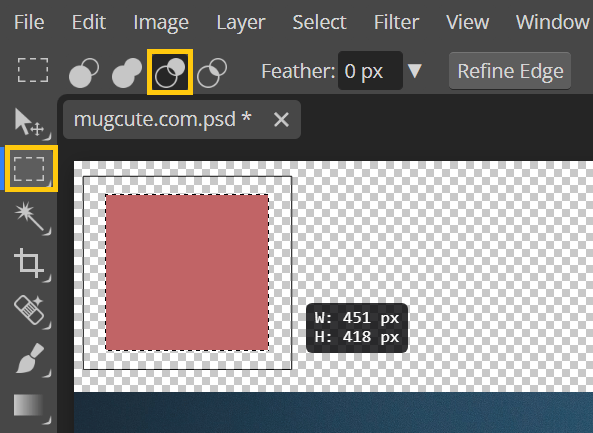
Mshortcut key to grab the Rectangular Marquee tool. Draw a rectangle on top of your image in any size you want.
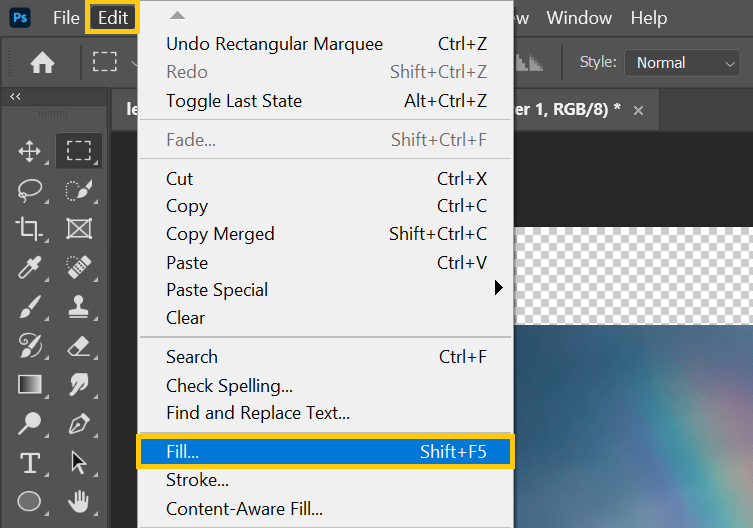
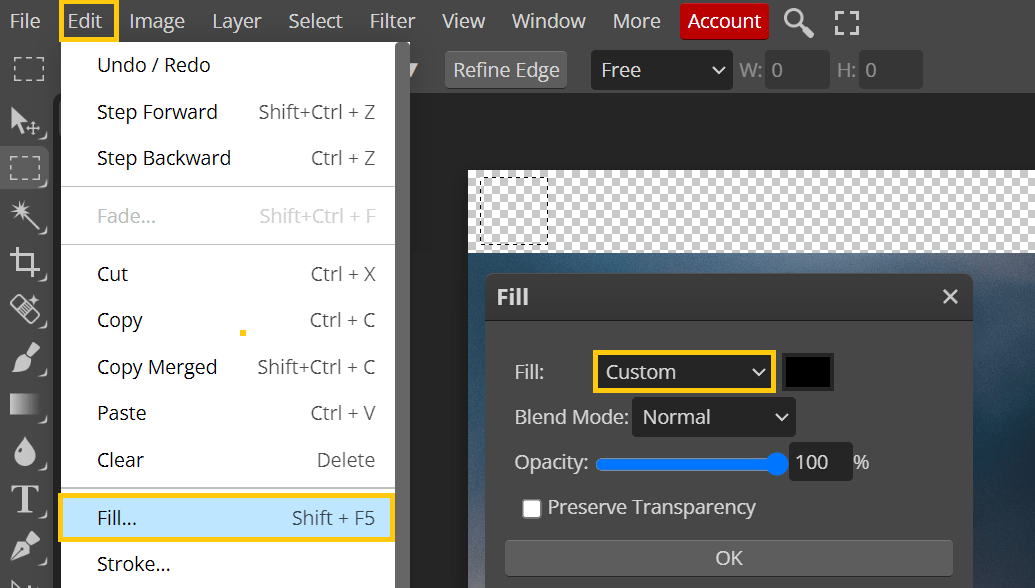
- From the Edit menu, choose “Fill.”

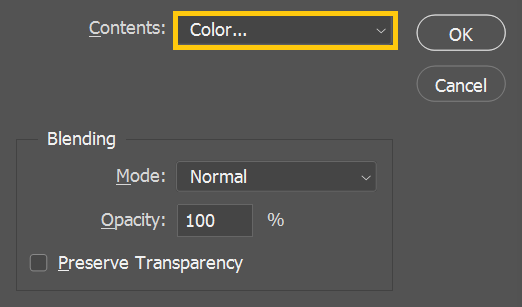
- Select “Color” from the Contents‘ dropdown menu.

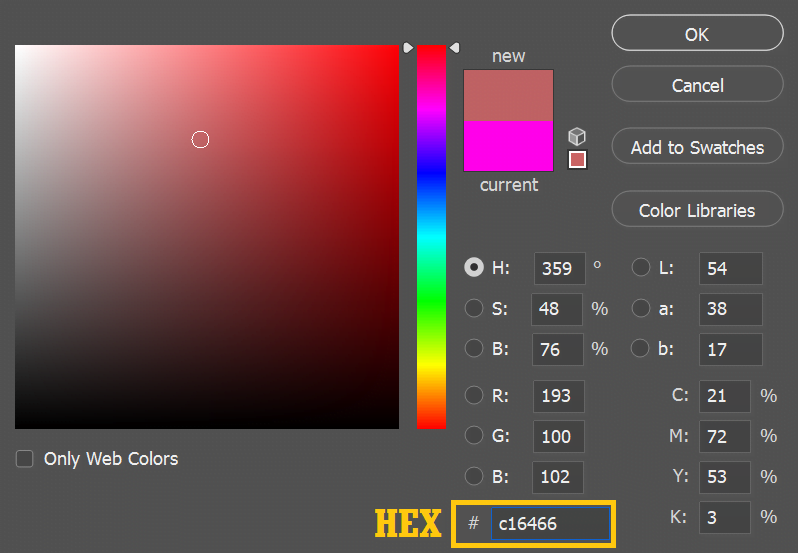
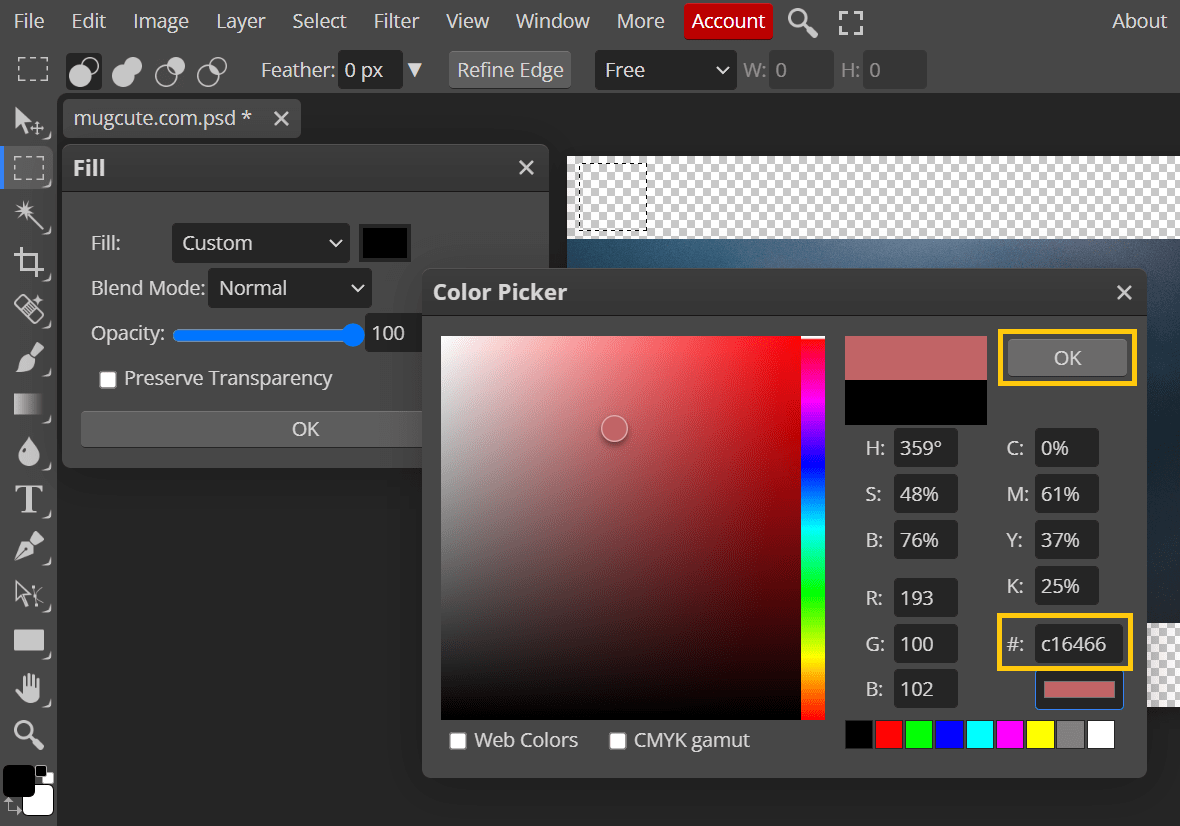
- Select the color you want to search or determine from the image. You can also manually fill in the HEX code. Click “OK” in the Color Picker (Fill Color) window.

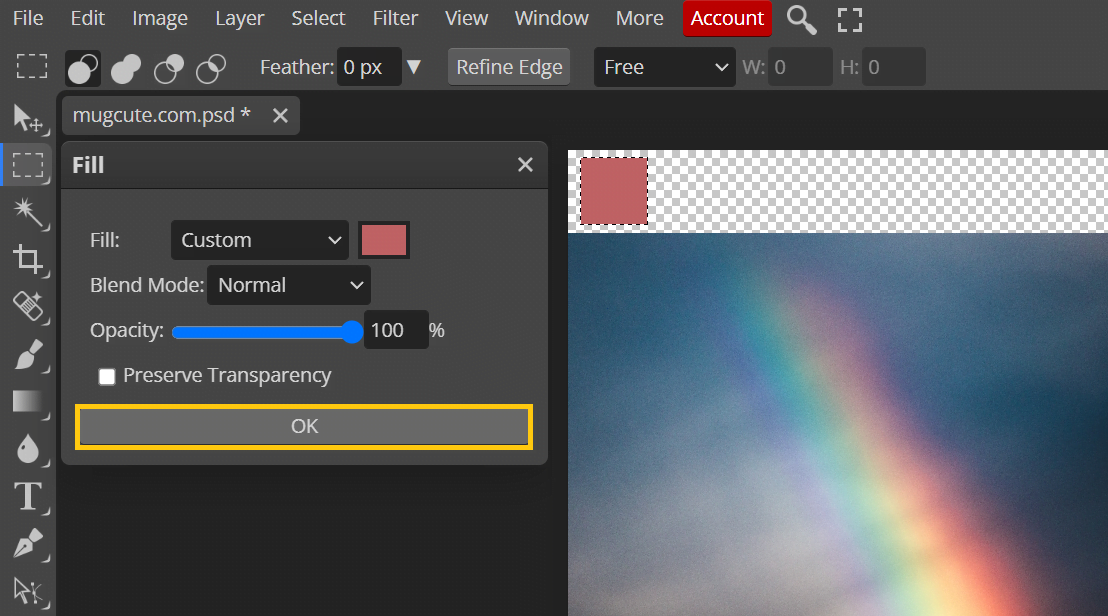
- Click “OK” again in the Fill window.
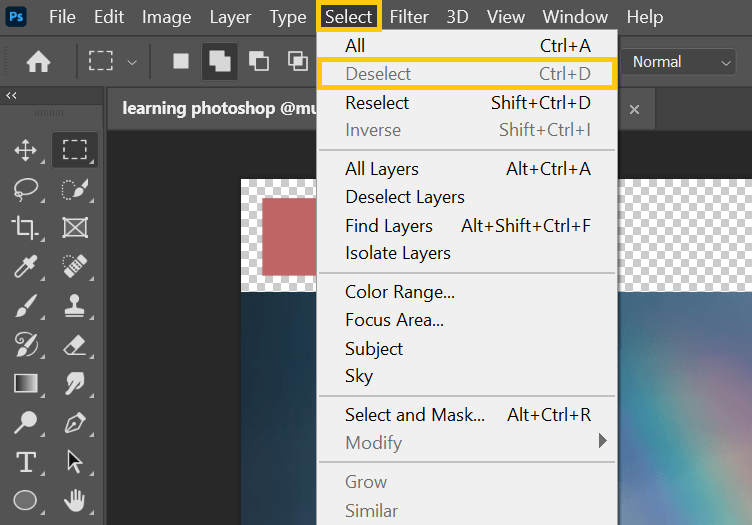
- Hit the
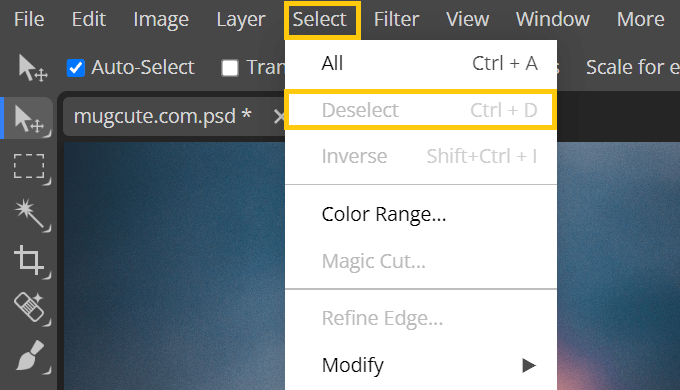
Ctrl/Command + Dshortcut key to deselect the color square. - Click your image layer from the Layers panel.
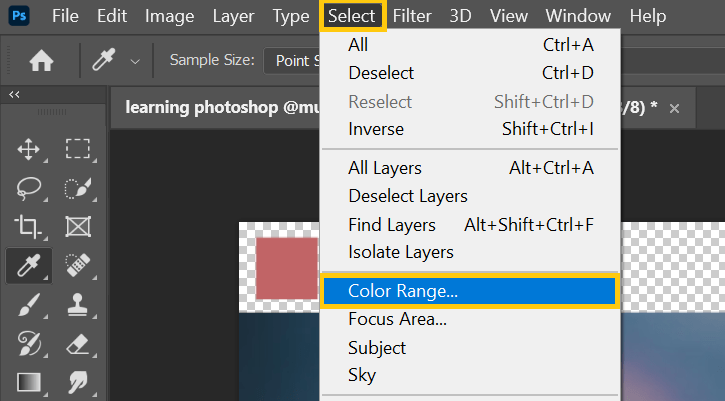
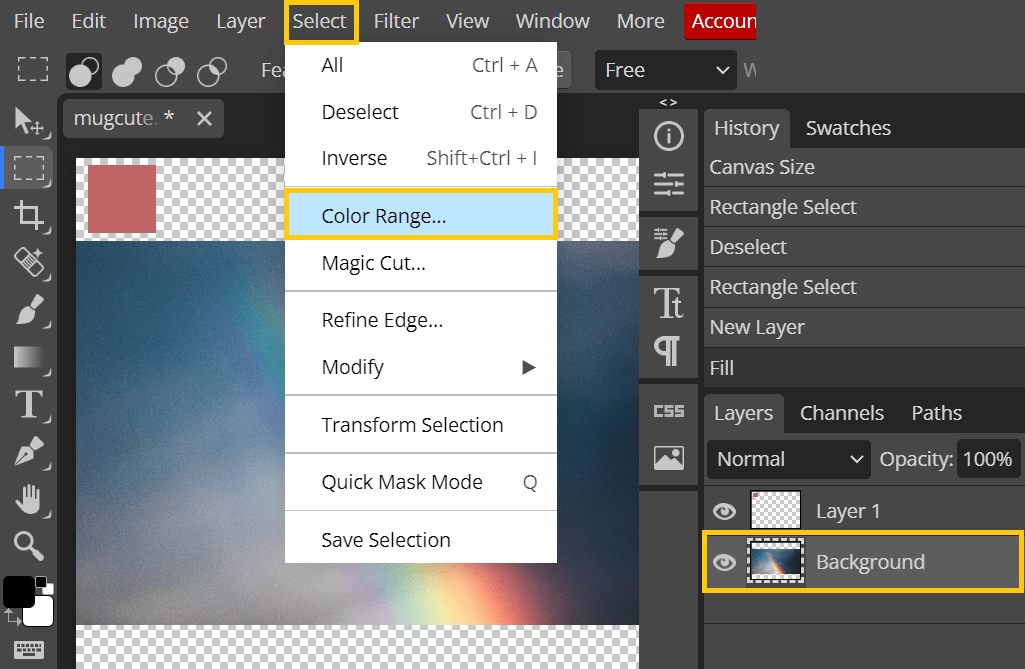
- From the Select menu, select “Color Range.”

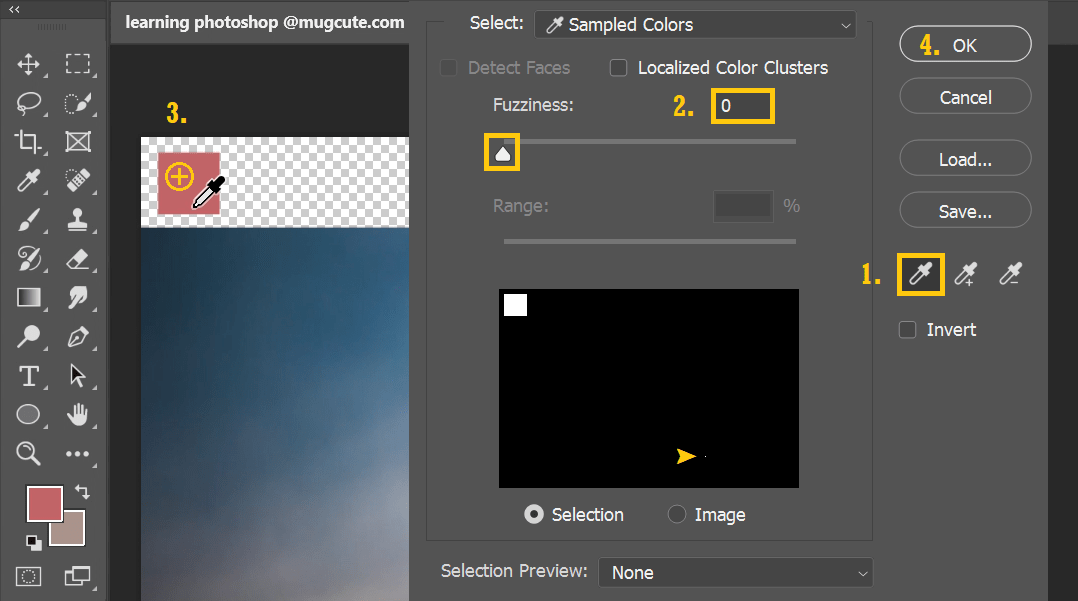
- Grab the “Eyedropper tool.” And then change the “Fuzziness” to 0. Sample the color from the color square.

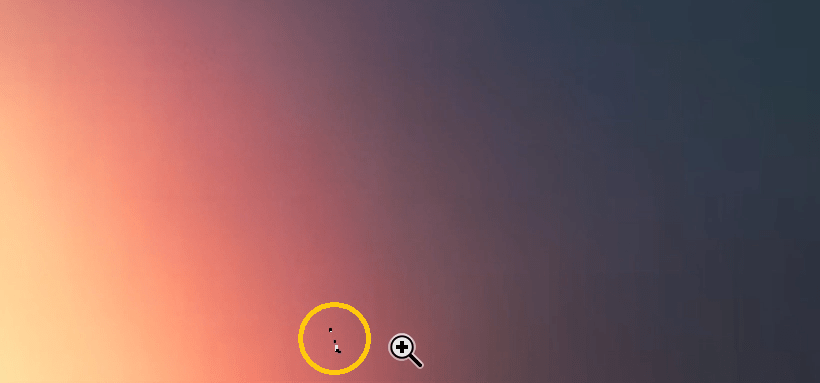
- If a particular defined color appears in the image, you will see some white areas in the Selection Preview. If you don’t see it in the Selection Preview, no worries, hit the “OK” button first.
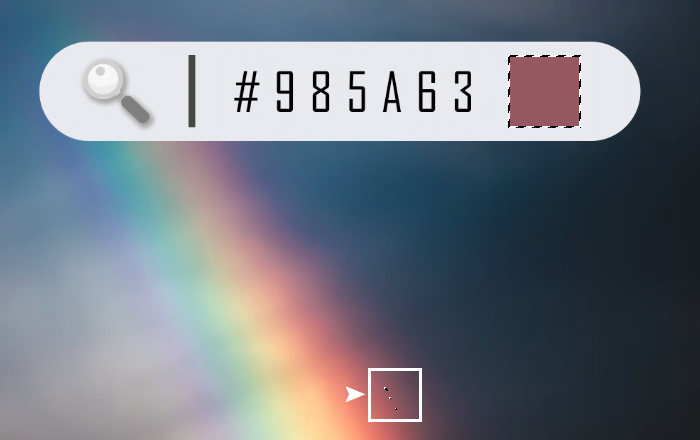
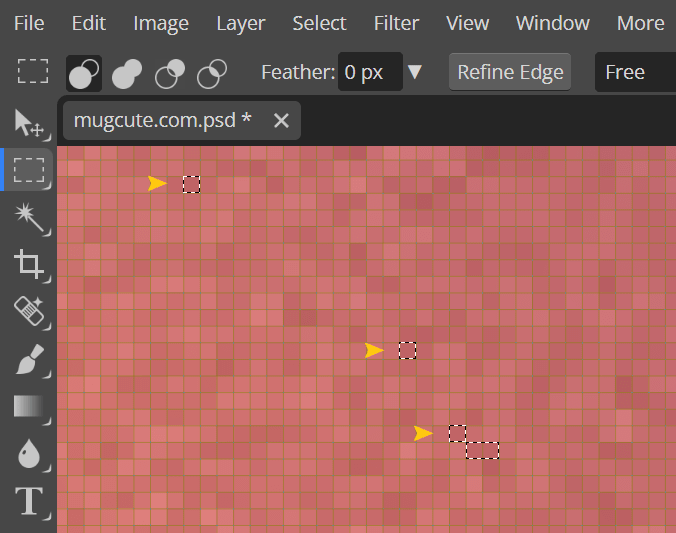
- Zoom in to your image and closely examine if any area has been selected.

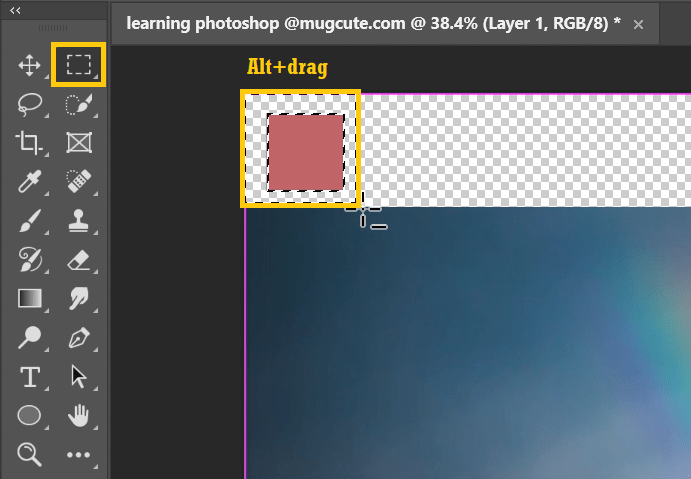
- If the image is so huge that you cannot see it or want to be sure of it, grab the Rectangular Marquee tool again. Hold on to the
Alt/Optionkey and subtract the color square selection. - Go to the Select menu and see if the “Deselect” is grey out or not. If you can choose to “Deselect,” that means somewhere in the image has that particular color. If it is grey out, that means there is no selection. Thus, no color has been picked up from the image.

Method 2: Using Photopea to do a reverse color check
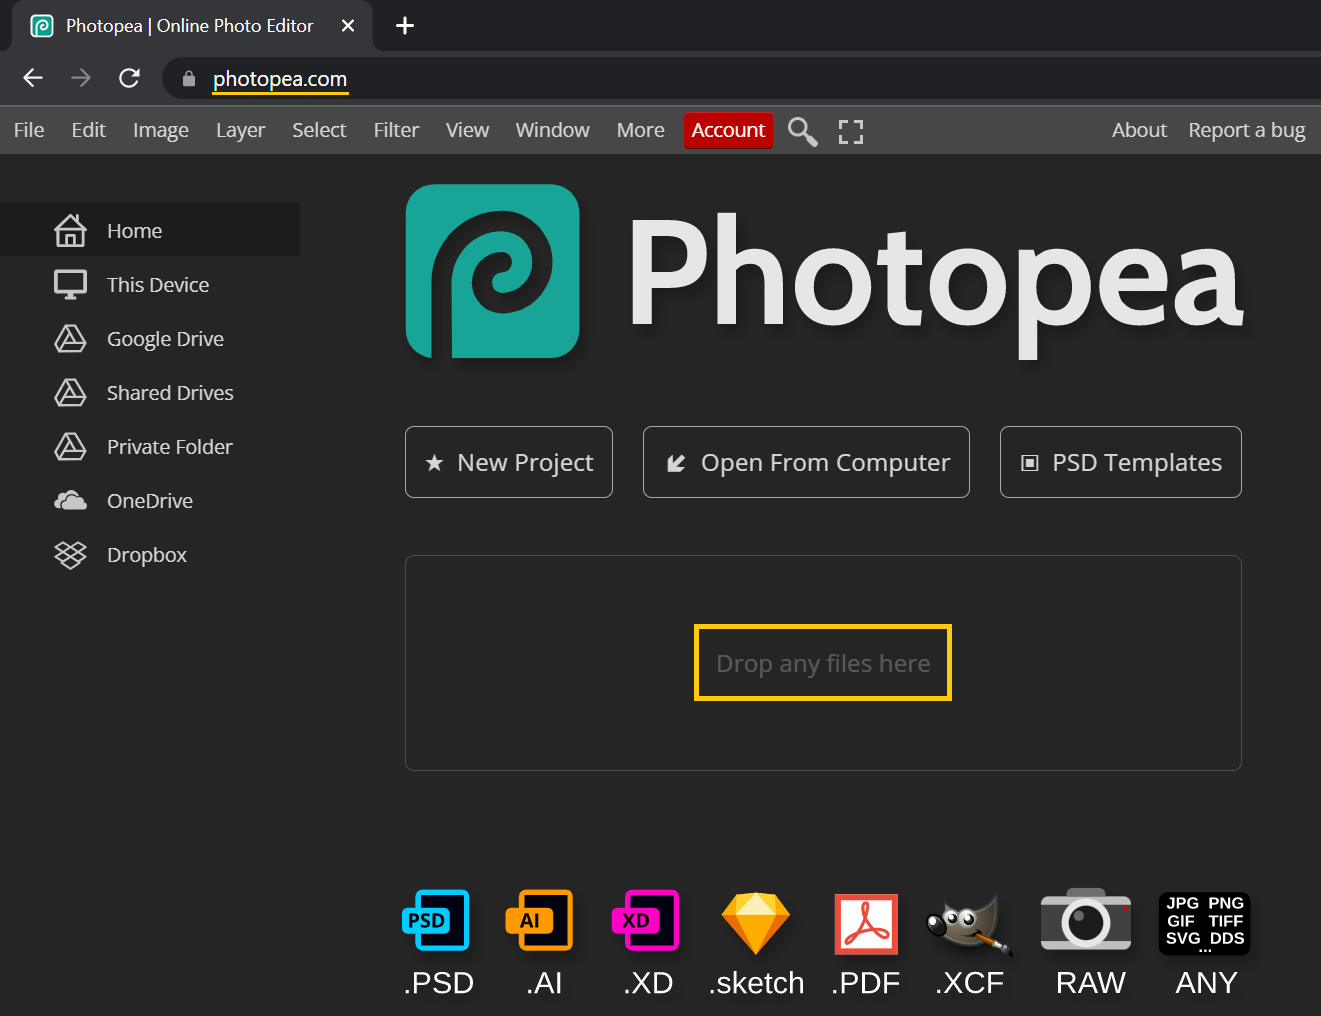
- Go to Google and search “photopea.” It is a free online photo editor for editing both raster and vector graphics with support for Adobe Photoshop Documents, Adobe Illustrator and Sketch files. You can do all kinds of advanced image editing, adjust the lighting, contrast and colors, and apply creative effects like Photoshop. You can also click here to access this powerful tool right away.
- Drag and drop your image directly to the browser to start.
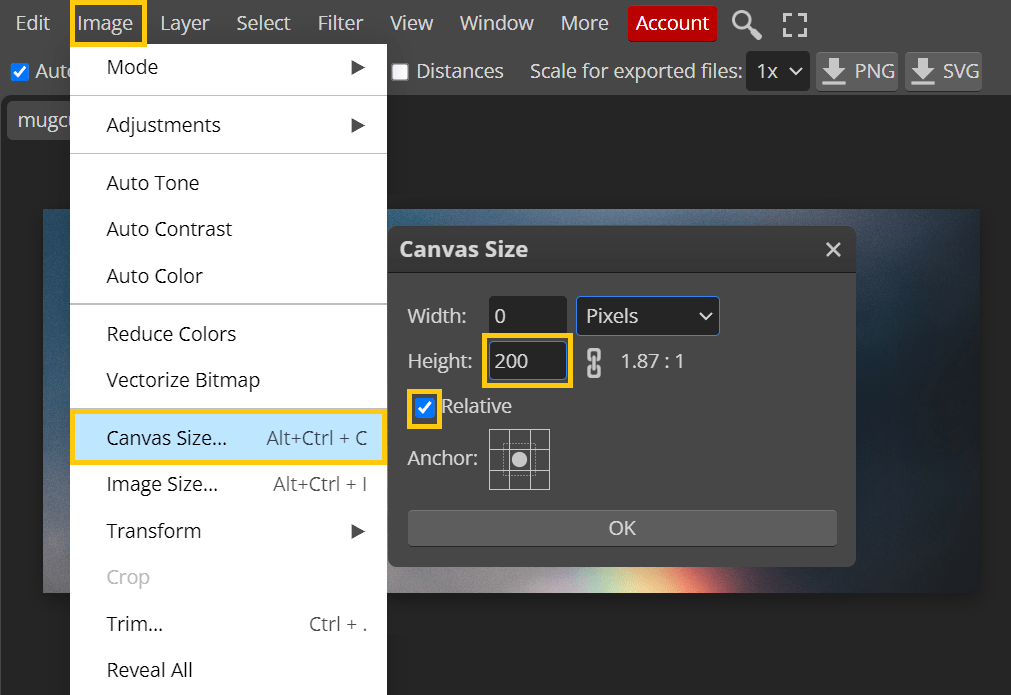
- From the Image menu, select “Canvas Size.”
Enable the Relative checkbox. Extend your canvas size a bit. Feel free to use any values for “Width” and “Height.” In this example, I am using 200 px for the extended height. Click the “OK” button.
- Click the “New Layer” icon at the bottom of the Layers panel to create a new layer on top.

- Grab the Rectangular Marquee tool, and draw a rectangle on the blank areas in any size you want.

- From the Edit menu, choose “Fill.” Then, select “Custom” from the Fill‘ dropdown menu.

- Pick a color you want to search from the image in the Color Picker window. You can also manually fill in the HEX code next to the # textbox. Click OK to confirm your color selection.

- Click “OK” again in the Fill window.

- Hit the
Ctrl/Command + Dshortcut key to deselect the color square. If it doesn’t work, go to the Select menu and click “Deselect.” - Click your image layer from the Layers panel. Then, select “Color Range” from the Select menu.

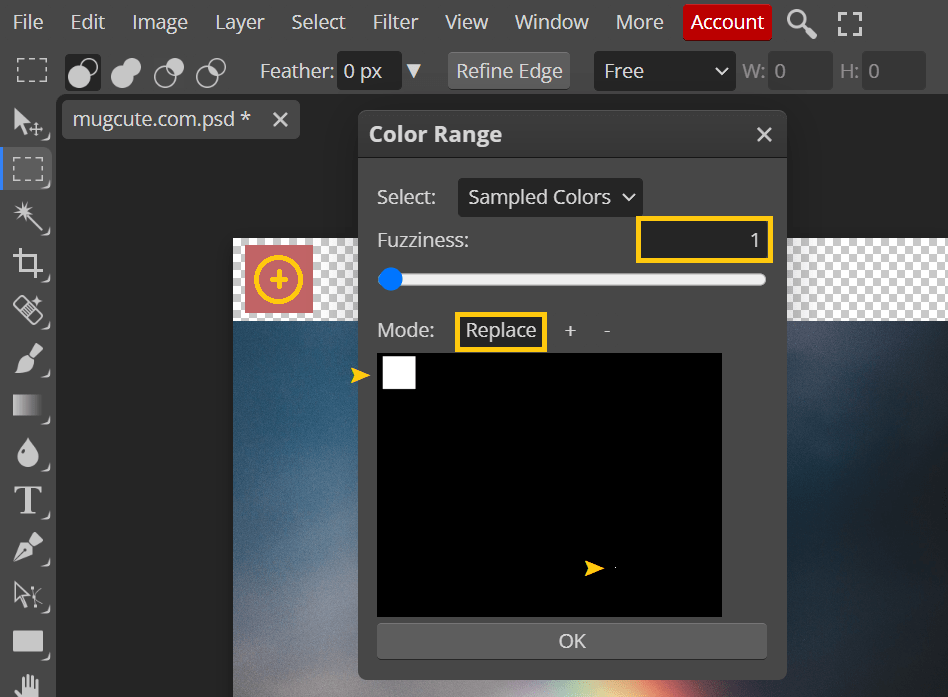
- Change the “Fuzziness” to 0. Ensure “Replace” is selected. Then, sample the color from the color square. If nothing shows up in the Preview panel (i.e., all black, including your color square), change the “Fuzziness” to 1 and sample the color square again. You are on the correct path if you see the black area changing to something like the image below.

- The white areas in the Selection Preview mean that particular color value exists in the image. If you don’t see it in the Selection Preview, no worries, hit the “OK” button first. Then, zoom in to your image and closely examine if any area has been selected.

- If the image is so huge that you cannot see it or want to be sure of it, grab the Rectangular Marquee tool again. Enable the “Subtract” mode. Drag and select the color square to subtract the selection only.

- Go to the Select menu and see if the “Deselect” is grey out or not. If you can choose to “Deselect,” that means somewhere in the image has that particular color. If it is grey out, that means there is no selection. Thus, no color has been picked up from the image.

Hope you find it helpful. Let me know if you have any questions; I would love to help further. If you are looking for speedy, high quality and well-priced work from a professional photo editor, check out more of the photo editing services available here.
Free icons Free online tools Free photoshop brushes Free poster templates Free textures Free vectors JPG to SVG NFT Photo editing Photopea tutorial Photoshop tutorial